We all know every motherboard comes with its own IO shield so that it can prevent the electromagnetic interference from the components.
If you love to construct your PC by yourself but do not know how to install IO shield, in that case, we can assure this content is going to help you out.
Remember, while you are building your PC, the first thing that you need to install is the IO shield.
Make sure you correctly set the IO shield; otherwise, you might not place other components accurately. You can follow our simple steps and place the IO shield.
How to Install IO Shield with Only 5 Steps for Proper Installation
To know how to install IO shield precisely, you can follow the given steps-
Step 1: Insert The IO Shield in The Right Way
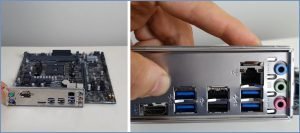
While you are installing the IO shield in your CPU’s casing, the first thing that you need to make sure if you are inserting the IO shield in the right way or not.
To verify the fact, first, you need to know how the motherboard is going to place in the casing and, after that, start lining up the IO shield with the motherboard, as shown in the given figure.
Step 2: Learn About the IO Shield in More Detail
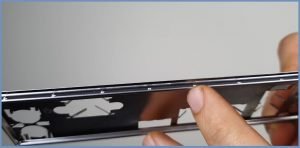
Before start installing the IO shield, you need to how the IO shield is going to fit in the case.
Look at the figure below here you can see the round-shaped bumps. These bumps help to prevent the shield from falling out of the case.
Step 3: Remove the Exhaust Fans
Sometimes it becomes quite challenging to install the IO shield in the case as the exhaust fan is too close to the IO shield brace.
So to ensure a smooth installation process, you need to unscrew the exhaust fan and then proceed to the next step.
Step 4: Start Installing
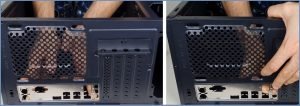
From this step, your installation process has started. At first, place your CPU’s case horizontally and begin the placement of the IO shield.
Apply force in the corner of the IO shield, as shown in the figure below. You will find it easier to apply force on the opposite corners together.
Remember, the bumps on the shield need to force above the metal brace of the case. If you hear a clicking sound, that means you have done it right.
Step 5: Verify the Installation Process
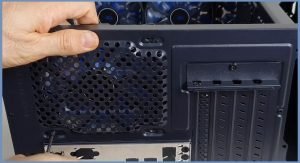
After completing the above steps, you need to verify whether you placed your IO shield correctly or not.
If all the bumps on the IO shield come out of the metal support of the case shown in the figure below, then you have successfully installed the IO shield.

Final Verdict
We are now optimistic that this article is helpful for you besides, all your inquiries on how to install IO shield have come to an end.
Following these steps, you can properly install the IO shield. Now you may build your PC with the utmost level of confidence and flexibility.
More To Explore: