Many times you get unnecessary notifications on the phone for software updates. For this reason, you have trouble operating the device.
Once the software update is complete, it is important to remove the process again. Because this can cause problems for your device when you are constantly updating software.
Don’t you understand how to remove it? Don’t worry! This article will help you. In this article, we will try to tell you how to remove software updates on Samsung. By following these steps, you can easily get rid of the software update on your device.
How to Remove Software Update On Samsung
If you update the software more than once, the device’s internal memory will be reduced. But it is not possible to permanently delete it, but it is possible to remove the notification that pops up.
Turning off a software update isn’t a difficult task. Just follow the steps with the images shown in this article. Then it will be easy for you. Ah, if you think busy then this video is going to help you with a quick fix!
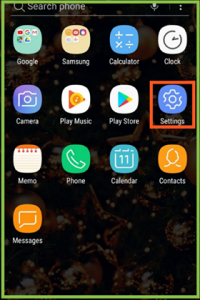
Step 1: Enter Settings Options
First, go to your phone’s settings. You can see in the image its icon looks like a gear. You can find this settings icon on your phone’s apps or menu options.
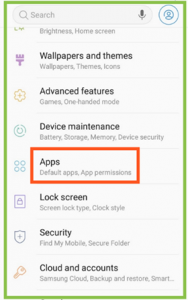
Step 2: Click on Apps
After going to settings you will see an option called apps. Then click on apps.
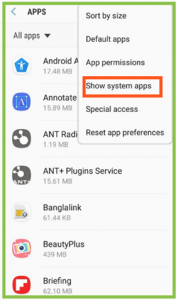
After clicking on the apps option you will see two dots (:) on the top right corner. And you will see the options show system apps. Then you will enter the show system apps. You will understand more clearly, the images that are given below.
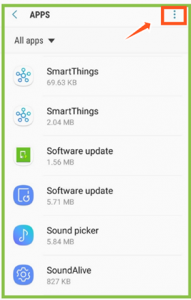
Step 3: Click On Software Update
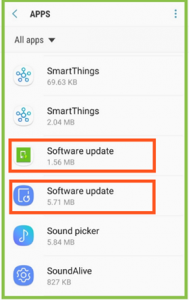
You have to scroll down after entering the show system app. Then you will find “software update” option. Here you can see two software update options.
The first one is a green icon. And the other one is a blue icon. Both are important for removing software updates.
Step 4: Click on Battery
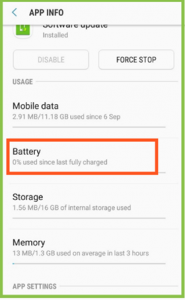
After entering the first software update option, you will see an option called “battery”.
Then tap on the battery and you will find “Allow background activity’’. You must turn off this blue option. So, you have to uncheck “allow background activity’’.
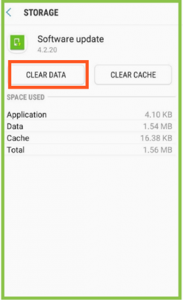
Step 5: Click on Storage
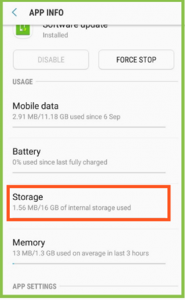
After unchecking “allow background activity”, you will go back and click on the storage option.
Then entering the storage, you will see the “Clear Data” and “Clear Cache” options. Tap on Clear Data.
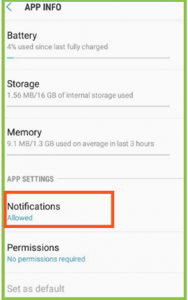
Step 6: Click On The Notification
After clicking on clear data you will go back and scroll down, then you will see the “notification” option.
Click on the notification option and you will see “app icon badges” and uncheck this option.

Step 7: Click On 2nd Software Update
Now you have to click on the second software update option. This is the main one for which software update instruction is provided.
After entering the software update, then click on the “Clear Cache” option.

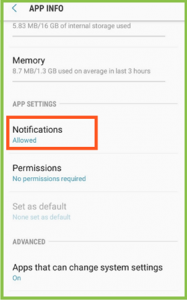
Step: 8 Tap On The Notification Option
After clicking on the clear cache option, you will go back and find out the ‘’notification’’. Click on the notification option.
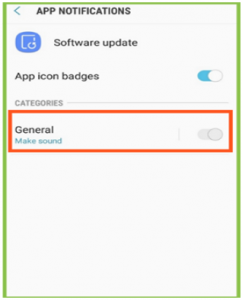
Then you will find the ‘’app icon badges’’, and ‘’General’’ options.
Next, you will uncheck the app icon badges. If it is turned on, then turn it off.
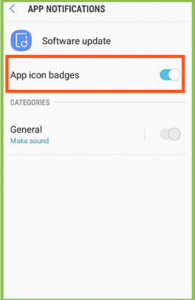
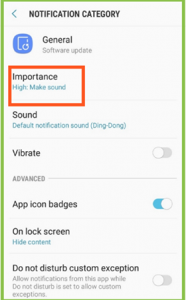
Step 9: Go to General Options
Below the app icon badge, you will find ‘’general options’’. And you will see the option named importance.
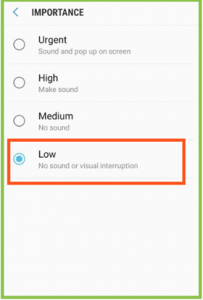
Step 10: Go to Importance Option
Click now on the option: Importance. Here, you see a few options: Low, Medium, or Urgent. Remove the software update by selecting Low.
After you completed all steps are, restart your device. You will no longer see the software update notification. And it will be removed. By following these steps properly you will know how to remove software updates on Samsung.
In this article, we have tried to make everything clear step by step. For those of you who are Samsung users, this article will be very helpful. If you follow the steps in this article, you will have a clear idea about how to remove software updates on Samsung.
Many of us face various problems when it comes to removing software updates. We hope if you follow the steps shown in this article, your problem will be solved. And that your device will operate without any hassle.
More To Explore: