Imagine you are out of the house or traveling to another state. Where wifi network is available but the password is protected. But it is urgent to complete a tight schedule work on your mac. Then what you will do?
Generally, we buy a data pack on our mobile phone for browsing. We can easily share the internet on our mac when staying out for a long time.
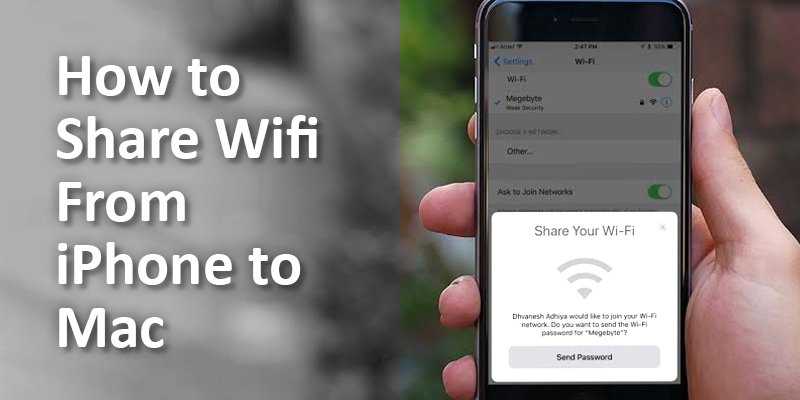
Through this article, we are showing you the easiest way to learn How to Share Wifi from iPhone to Mac. Let’s Start.
For sharing your Wi-fi from iPhone to Mac you need to have a 3G or 4G data connection. Otherwise, it won’t work.
Connecting a Mac from iPhone via Hotspot is quite simple. Try the below steps, if you can’t share your Wi-fi password yet.
On the iPhone Device
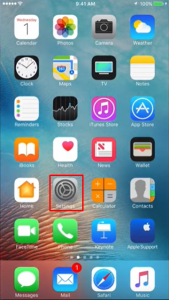
Step: 1
Press Settings from the Home screen
Step: 2
After opening a new window, tap Personal Hotspot.
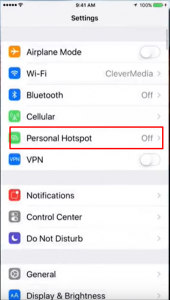
Step: 3
- Next Turn on Personal Hotspot to share your iPhone’s internet connection.
- Then set a password for your hotspot.
- You can set or change your Hotspot name.

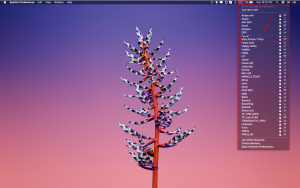
On The Mac Device
Step: 1
Click the Wifi icon in your Mac’s menu bar first.
Step: 2
Various Wi-fi networks will show up. The maximum time it can see
locally in your device. Select your Wifi name which you created just before for Hotspot.
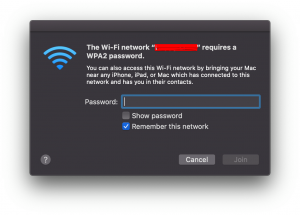
Step: 3
Enter your Password that you set before and tap Join finally.
Now you are connected with your iPhone Hotspot and you can use your iPhone internet on your Mac happily. Your network speed is totally depending on how good the iPhone’s network connection you are using. You can find that the internet runs a little slower than what you are used to.
By following the above instructions, you can use your iPhone internet with another device also. Ex: Android, Windows, etc.
We hope you have learned How to Share Wifi from iPhone to Mac gradually. So we can say that your wish has been fulfilled already.
More To Explore: