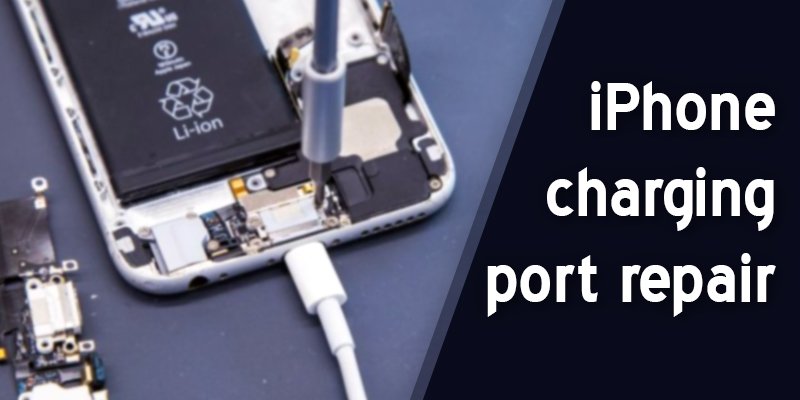
Are you messed up with your iPhone 7 charging issues? If your phones charging port is loose or it’s not charging at all, then probably your charging port is damaged. Hence it requires an iPhone charging port repair.
It may seem that this is a very critical chore, but if you have the right tools and bit of patience, then this is a kind of fix that you can do all by yourself. This article is going to be your complete and easy guide on iPhone charging port repair.
iPhone Charging Port Repair
Tool and Things That We Need
If you decided to repair your iPhone 7 by own self then, you must arrange the followings:
- P2 pentalobe screwdriver
- Hairdryer
- Opening picks of six set
- Suction cup
- Tri-point y 000
- Tweezers
- Phillips 00 driver
- Sim eject tool
- Spudger
- iPhone standoff screwdriver
- Replacement seals(for best reassemble)
- New charging port.
Precautions Before Opening
- Keep your battery below 25%.
- It includes a couple of disassemblies, so make sure you have enough time on your hand.
- Switch off your phone before you start.
- Since the waterproof seal will be exposed, so make sure you are doing it in a dry place.
- Keep small containers or packets to save and track screws. You must put the screw on its exact place for a flawless repair.
Step 1: Remove the pentalobe screw
To start with the iPhone charging port repair process, you will first look down to the charging port. Just beside the port, you will find two 3.4 mm pentalobe screws. Remove the screws with pentalobe screwdrivers.

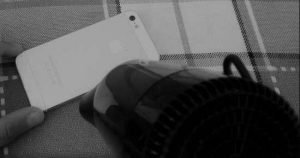
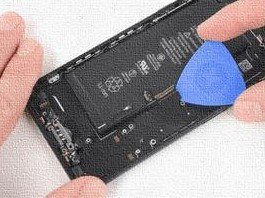
Step 2: Soften the adhesive
With the help of an opener or hairdryer, heat the edges of the iphone7 to loosen the adhesive.
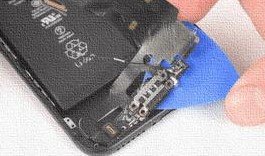
Step 3: Detaching the case
Now first attach the suction cup on the screen and then pull it up carefully to create a gap in between the screen and the situation. Insert the flat end of the smudger slowly and slide to the left between the gap. Careful not to pull the case directly to open vertically.

Step 4: Opening the case
Since the logic board is connected to the screen, so don’t pull off the screen. Be slow and open it from the left side and keep the angle maximum at 90 degrees.

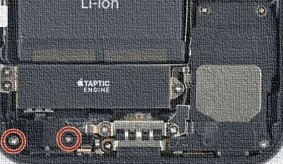
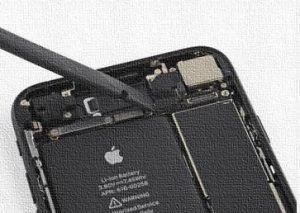
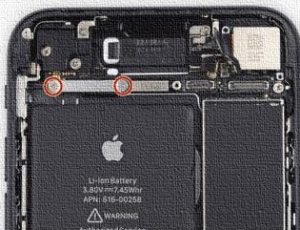
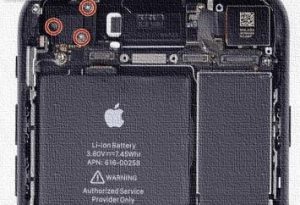
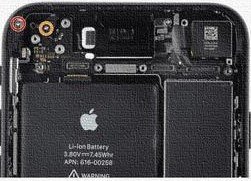
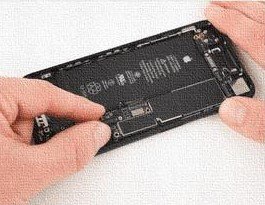
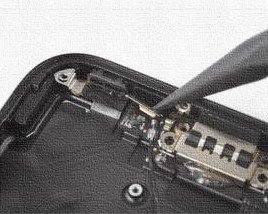
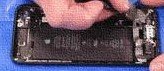
Step 5: Disconnecting the battery
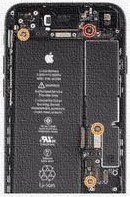
Now on the right side of the case, you will find three tri-point screws (Pic: A). Open them with a tri-point screwdriver. Open the bracket and disconnect the battery connector (Pic: B) with the point of the spudger.

(Pic: A)

(Pic: B)
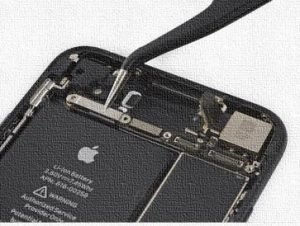
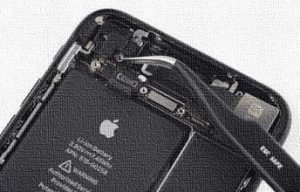
Step 6: Disconnecting the Display
From the lower display connector, disconnect the two display connectors (Pic: A) from the logic board with the flat end for the spudger. And from the top end, remove the two Phillips screws and open the bracket of the sensory assembly. With the spudger, remove the front camera sensor(Pic: B) from the socket. And your display is separated. Keep the screen at a safe place.

(Pic: A)

(Pic: B)
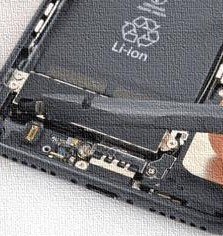
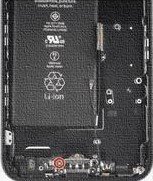
Step 7: Removing the logic board and other parts:
This the crucial steps in the process of iPhone charging port repair. The charging port is under the logic board and the loudspeakers. So you need to remove the followings one after another very carefully as follows :

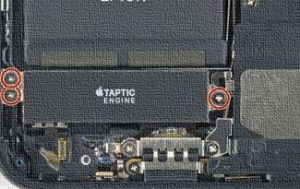
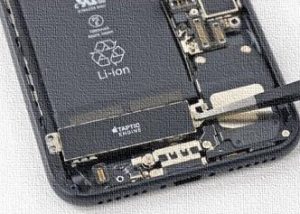
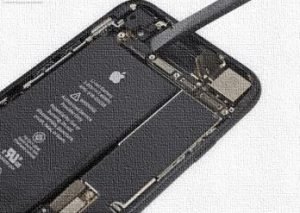
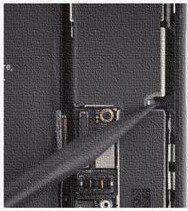
Removing sim card Slot: By disconnecting the lower cable connector with the flat end of the spudger as mentioned in the picture, you will remove the sim card slot first. Removing Taptic Engine: By following the picture chronologically, from top to bottom, open the Barometric Vent by unscrewing the two Phillips screws. Remove the vent with a tweezer, then disconnect the taptic engine. Unscrew the 3 Phillips screws and remove the taptic engine.
Removing Camera: By eliminating the camera connector by the pointer of the smudger, unscrew the screws holding the camera with a bracket. Remove the bracket with a tweezer. You will now disconnect the camera and lift the camera out from the rear case.

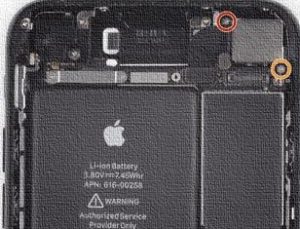
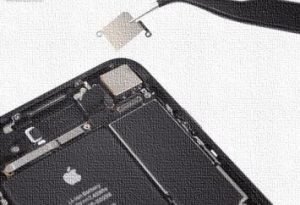
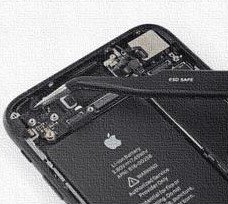
Disconnecting the upper Cable connectors: Now, you will unscrew the two tripoint screws and then remove the bracket with a tweezer. Disconnect the top cable connector from here, as mentioned in the picture with the flat end of the spudger.
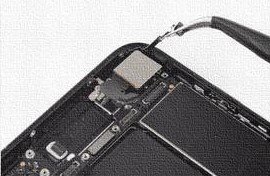
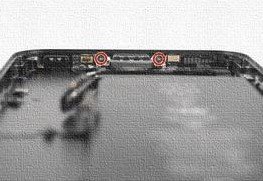
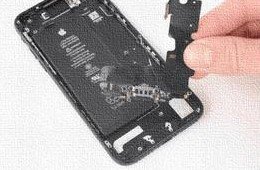
Disconnecting WIFI Antena: Open three Phillips screws at the top left corner, and take out the WIFI antenna with a tweezer.
Disconnecting Logic board top end connection: After removing the wifi antenna, you will find two screws open those and remove the bracket with a tweezer. Now at the left end, you will find another screw open it and gently disconnect the logic board connector from the top end.

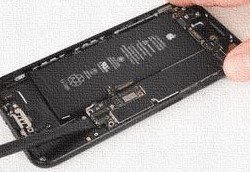
Removing Microphones: Now open the Philips screw from the lightning connector and, with the help of the tweezer, remove the spring contact. Now you will see two more screws holding the lightning connector, unscrew them, and you will find small stickers covering the screws holding the lightning connector to the bottom end of the rear case. Remove the sticker, and you will unscrew the screws. Then detached the two microphones from the bottom of the case.
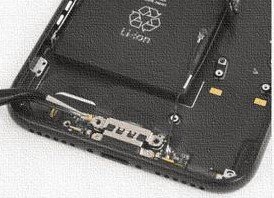


Loosening the lightening connector: Since the charging port is connected to the lightning connector so now we will again use a hairdryer to loosen the adhesive sticking the lightning connector to the case.
Removing the charging port: Start from the middle of the connector and slowly continue to separate until it reaches the connector and by your hand to pull off the connector from the base gently when the connector is out of the hole to bring out the connector with the charging port. It is to mention that there is a gasket made of rubber at the port, pull it off, and stick it to the new lighting connector port to protect it from dust and water.


Step 8: Repair and final step:
Now when the old port with the lightning connector is out the phone, insert the new charging port and repeat the backward step of connecting and screwing the screws correctly one after another to get back your iPhone in its real feature.
Therefore the process of iPhone charging port repair is a lengthy one. But seriously, it is a fantastic experience over what’s inside an iPhone. We hope that this article is going to be very helpful for you, and you will be able to repair your favorite iPhone 7charging port all by yourself.
More To Explore: