
“iPod is disabled connect to iTunes” this nagging error often happens to iPod users. When your iPod shows a message that is disabled and can not able connecting to iTunes, it indicates that your iPod is entirely locked down.
Behind this error has many reasons. Often it may happen by entering the wrong password many times. If your kid, snoopers, or any nosy parker try to unlock your iPod for seeing what is going on, then your iPod touch can be disabled. After trying six times in a row, your iPod may show disabled by saying “connect to iTunes” to you.
Are you hoping to fix this issue yourself? Then discover the solution by following our guidelines step by step.
How Do You Fix: iPod Is Disabled Connect To iTunes
Through restoring your iPod device, you can be able to solve out your iPod disabling issue. Then you can connect your iPod to iTunes as previously.
Before reinstalling the iPod, you can follow our precautions to ensure your safety.
Precaution before restoring
Don’t forget to keep backup before restoring. Because, after restoring, your iPod loses all your data, photos, videos, messages, notes, and more.
Here are our steps to fix iPod is disabled connect to iTunes issue.
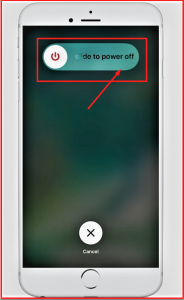
Step 1: Power off your device
In the first step, you need to shut down. For shutting down your iPod, hold down on the “Power Button.”

Then it shows a slide. In that slide, you have to turn it off.
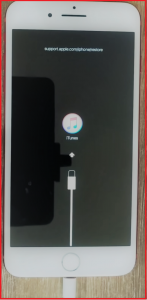
Step 2: Hold down the “Power Button”
Insert USB cable and hold down the “Power or Home Button.”
Now your device is ready to show the iTunes logo and USB cable.
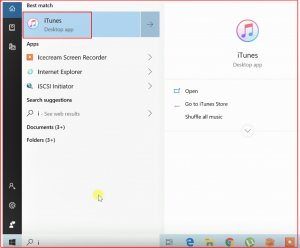
Step 3: Open iTunes
If iTunes doesn’t popup automatically, then open it.
Step 4: Windows is popping up
After connecting the device, the updated dialog will popup. There have three options you can see. These are “Cancel,” “Update,” and “Restore.” Click on “Restore.”

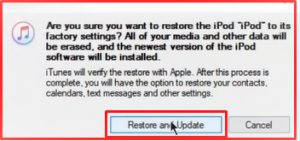
Step 5: Select “Restore and Update”
Click on “Restore and Update” again.
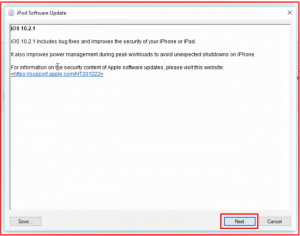
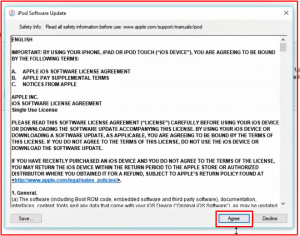
Step 6: Choose “Next,” then “Agree”
And it is going to give you a massage. Click on “Next” to continue. Then click “Agree” on the safety information. Now the software download process is going to begin.
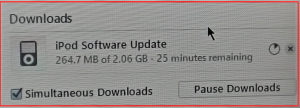
Step 7: File is extracting
After completing the download, it starts extracting the file.
Step 8: The restoring process is complete
Certainly, your device is restored and ready to work.

Lastly, you can see “Hello” then “Hola” as a brand new iPod, where it has no password, no data, no notes.
Conclusion
After finishing all the steps, you can set up your iPod again. Finally, you are now able to connect your iPod to iTunes. For completing these steps, you don’t need to take any tech specialist’s help. Instead, you can solve this error within a short time yourself.
Remember one thing that there is no way to fix a disabled iPod without restoring. If you are in trouble to fix iPod disable issue, then we can say that the solution mentioned above can help you surely. We are hoping so that you have found your solution to fix out the iPod is disabled connect to iTunes.
N.B: With this simple method, you can solve the iPod, iPhone, and iPad disabled issue by one hand. This method is also helpful in solving another problem, such as “iPod stuck on Apple logo” or “iPod stuck in Recovery mode.”
More To Explore: